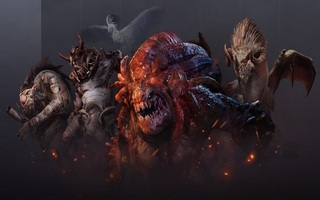
From April 16, 2026, the Altar of Blood, a dormant abyssal rift, will be available again in the Black Desert MMORPG.
Notation say it was used as an altar for sacrifices in the ancient times of Kzarka, but was later sealed by the Gem of Balance.
But the Secret Guardians Yaz and Orwen discovered traces of the immortal alchemist Caphras in the area of the Star’s End, which led to a secret Altar hidden in the gray fog of the Black Star.
Blood Altar variants
You can enter the Altar of Blood via solo matching or as a 3-player party. Three Adventurers must cooperate to protect the relic from waves of monsters or defeat powerful bosses.
Solo matching
The Altar of Blood consists of 21 stages, from The 1st Illusion to The 21st Illusion.
For solo matching, you must meet the minimum AP and DP requirements for each stage.
The requirements for each stage are as follows (Higher stages may be added later):
| Stage | Category | Min. AP (Displayed AP) | Min. DP (Displayed DP) |
|---|---|---|---|
| 1 | Normal | 300 | 390 |
| 2 | Normal | 305 | 390 |
| 3 | Boss | 310 | 400 |
| 4 | Normal | 315 | 400 |
| 5 | Normal | 320 | 400 |
| 6 | Boss | 325 | 410 |
| 7 | Normal | 330 | 410 |
| 8 | Normal | 335 | 420 |
| 9 | Boss | 340 | 430 |
| 10 | Normal | 345 | 430 |
| 11 | Normal | 350 | 430 |
| 12 | Boss | 355 | 430 |
| 13 | Normal | 360 | 430 |
| 14 | Normal | 365 | 440 |
| 15 | Boss | 370 | 440 |
| 16 | Normal | 375 | 440 |
| 17 | Normal | 380 | 440 |
| 18 | Boss | 385 | 450 |
| 19 | Normal | 390 | 450 |
| 20 | Normal | 395 | 450 |
| 21 | Boss | 400 | 460 |
3-player party
To participate in the Altar of Blood, a 3-player party is required, which can be joined as a group of three, or join other players through the search system.
If matching as a 3-player party, you can enter even if you do not meet the minimum requirements.
When entering Altar of Blood as a party, the highest stage your party can challenge is based on the lowest clear record among all party members.
For example, if two members have cleared up to Stage 5 and one has cleared up to Stage 3, the party can only enter up to Stage 4 (the next challenge for the Stage 3 member).
Abyssal Illusion
April 23, 2026 added the 1st Abyssal Illusion, available for Adventurers who have cleared Altar of Blood – The 21st Illusion.
In Abyssal Illusion, devices that indicate monster spawn locations or timings in advance have been removed, requiring greater mastery and caution.
| Abyssal Illusion | |||
| Required AP | Recommended Total AP | Required DP | Recommended Total DP |
| 395 | 1895 | 450 | 760 |
May 28, 2026 added Altar of Blood – The 2nd Abyssal Illusion.
In the Abyssal Illusion, devices that reveal spawn locations or upcoming spawns have been removed. It requires a high level of skill, so be careful
| The 2nd Abyssal Illusion | |||
| Min. Matching AP | Recommended Total AP | Min. Matching DP | Recommended Total DP |
| 395 | 1895 | 450 | 760 |
July 16, 2026 added Altar of Blood – The 3rd Abyssal Illusion.
In the Abyssal Illusion, devices that reveal spawn locations or upcoming spawns are removed. This mode requires a high level of skill, so proceed with caution.
| The 3rd Abyssal Illusion | |||
| Min. Matching AP | Recommended Total AP | Min. Matching DP | Recommended Total DP |
| 395 | 1895 | 450 | 760 |
How to enter the Altar of Blood
How to participate in the Altar of Blood:
Go to Menu (ESC) – War (F7) – Find Match in the Altar of Blood menu.
If you apply as a 3-player party, you will enter with your party members. If you apply solo, you will be matched with other Adventurers.
The Party Leader may change based on the order of entry

Altar of Blood Rules
- The Altar of Blood consists of 21 stages. You must clear the previous stage to progress to the next.
- Higher difficulty levels may be added in the future.
- If you exhaust all 5 attempts provided upon matching, your party will be automatically moved out of the Altar of Blood.
- There is no weekly limit on entries. You can re-apply for matching and enter again at any time.
- In addition to weekly rewards, you can obtain a first-time clear reward once per Family for each stage.
- Clear records do not reset. You can resume your challenge from the highest stage you have previously reached.
- Upon entry, the Party Leader selects the stage.
- Once the Party Leader selects a stage and presses Start Game, that stage begins immediately.
- Resurrection is unavailable if you die (Witch/Wizard Resurrection skills and Medical Kits cannot be used).
- All characters resurrect and recover HP upon completing or failing a stage.
- If all three party members die, the stage fails. All monsters will disappear, and members will revive with full HP. The stage selection UI will then appear.
- Campsites, Maid/Butler, World Map, Quests UI, and Minimap UI are unavailable.
- Combat and Skill EXP cannot be obtained from defeating monsters.
- Item Drop Rate and Item Drop Amount effects do not apply.
- If combat does not start or there is no progression for 10 min after entry, you will be automatically removed from the altar.
Altar of Blood Guide
The Altar of Blood is divided into normal stages and boss stages.
In normal stages, your main purpose is to defeat monsters rushing toward the central relic.
If monsters reach the relic, its HP will decrease. If the relic’s HP reaches 0%, the stage will fail.
In boss stages, a specific boss appears. Your goal is to defeat the boss while completing specific mechanics.
Bosses enter berserk form 6 minutes after appearing, significantly increasing their AP and DP.
If the boss is not defeated within 8 minutes of appearing, the stage will fail.
Altar of Blood Rewards
Clearing stages in the Altar of Blood grants weekly rewards and first-time clear rewards.
Weekly Rewards
Based on your weekly records, rewards are sent to the Black Spirit’s Safe every Sunday at 00:00 (Once a week per Family).
Rewards are available for each stage, but you will only receive the reward for the highest stage cleared during that week.
Example: Even if you clear Stages 10, 15, and 20 in the same week, rewards do not stack. You will only receive the Stage 20 weekly reward.
First Clear Rewards
When you clear each stage for the first time, rewards are automatically sent to Black Spirit’s Safe (B).
🤩 Higher stages offer better rewards, with more item types, larger quantities, and higher chances.
| Altar of Blood Reward Example – Stage 21 | ||
| Weekly Reward | First Clear Reward | |
| Random Drop | Guaranteed within set quantity | Guaranteed |
    Gold Bar Box x14 (Contains Gold Bar 1,000G x3-10) Resplendent Origin of Dark Hunger x4 Resplendent Essence of Devouring x9 Advice of Valks (+300) Advice of Valks (+250) Advice of Valks (+200) |      Gold Bar Box x4 (Contains Gold Bar 1,000G x3-10) Resplendent Origin of Dark Hunger Advice of Valks (+100) Trace of Nature 24-29 Sealed Black Magic Crystal 60-65 Caphras Stone 80-85 Ancient Spirit Dust 80-85 Black Stone 120-125 | Resplendent Origin of Dark Hunger Resplendent Essence of Devouring x3 Gold Bar Box x3 (Contains Gold Bar 1,000G x3-10) Advice of Valks (+200) |
| Altar of Blood Reward Example – Stage 11 | ||
| Weekly Reward | First Clear Reward | |
| Random Drop | Guaranteed within set quantity | Guaranteed |
   Gold Bar Box x4 (Contains Gold Bar 1,000G x3-10) Origin of Dark Hunger Advice of Valks (+170) Advice of Valks (+150) |  Gold Bar Box x2 (Contains Gold Bar 1,000G x3-10) Origin of Dark Hunger Advice of Valks (+80) Trace of Nature 15-20 Sealed Black Magic Crystal 45-50 Caphras Stone 60-65 Ancient Spirit Dust 60-65 Black Stone 70-75 | Gold Bar Box (Contains Gold Bar 1,000G x3-10) Advice of Valks (+100) |
| Altar of Blood Reward Example – Stage 1 | |
| Weekly Reward | First Clear Reward |
| Guaranteed within set quantity | Guaranteed |
  Gold Bar Box (Contains Gold Bar 1,000G x3-10) Essence of Devouring Advice of Valks (+50) Advice of Valks (+40) Trace of Nature 10-15 Sealed Black Magic Crystal 15-20 Caphras Stone 25-30 Ancient Spirit Dust 25-30 Black Stone 25-30 |   Resplendent Essence of Devouring Gold Bar Box (Contains Gold Bar 1,000G x3-10) Advice of Valks (+70) Advice of Valks (+60) |
Rewards 1st Abyssal Illusion
Clear the 1st Abyssal Illusion to obtain Bloodstained Spoils – Abyssal Illusion. Open it to receive the following rewards.
| Bloodstained Spoils – Abyssal Illusion(Weekly Clear Reward) | |
| Guaranteed | Obtained with a set probability |
        Resplendent Origin of Dark Hunger Advice of Valks (+100) Trace of Nature x25-30 Sealed Black Magic Crystal x60-65 Caphras Stone x80-85 Ancient Spirit Dust x80-85 Black Stone x125-130 Gold Bar Box x5 |       Advice of Valks +200/+250/+300 Resplendent Origin of Dark Hunger x5 Resplendent Essence of Devouring x10 Gold Bar Box x15 |
Rewards 2nd Abyssal Illusion
Weekly clear reward “Bloodstained Spoils – Abyssal Illusion” for completing The 2nd Abyssal Illusion.
| Bloodstained Spoils – Abyssal Illusion (Weekly Clear Reward) | |
| Guaranteed | Obtainable at a set probability |
Resplendent Origin of Dark Hunger Advice of Valks (+100) Trace of Nature x25-30 Sealed Black Magic Crystal x60-65 Caphras Stone x80-85 Ancient Spirit Dust x80-85 Black Stone x125-130 Gold Bar Box x5 (Obtain Gold Bar 1,000G x3-10 upon opening) | Advice of Valks (+200/+250/+300) Resplendent Origin of Dark Hunger x5 Resplendent Essence of Devouring x10 Gold Bar Box x15 (Obtain Gold Bar 1,000G x3-10 upon opening) |
Rewards 3rd Abyssal Illusion
Complete the 3rd Abyssal Illusion to obtain the weekly reward Bloodstained Spoils – Abyssal Illusion containing the following rewards
| Bloodstained Spoils – Abyssal Illusion (Weekly Clear Reward) | |
| Guaranteed | Obtainable at a set probability |
Resplendent Origin of Dark Hunger Advice of Valks (+100) Trace of Nature x25-30 Sealed Black Magic Crystal x60-65 Caphras Stone x80-85 Ancient Spirit Dust x80-85 Black Stone x125-130 Gold Bar Box x5 (contains Gold Bar 1,000G x3-10) | Advice of Valks (+200/+250/+300) Resplendent Origin of Dark Hunger x5 Resplendent Essence of Devouring x10 Gold Bar Box x15 (contains Gold Bar 1,000G x3-10) |
Altar of Blood: Level Breakdown
Overall, completing the Altar of Blood isn’t difficult, the main thing is to prepare in advance.
- Buffs, food, alchemy, etc.
- Include a Knockdown/Bound resistance crystal (Ancient Magic Crystal of Nature – Adamantine) in your crystal build.
- Choose the right classes with a good area-of-effect attack range
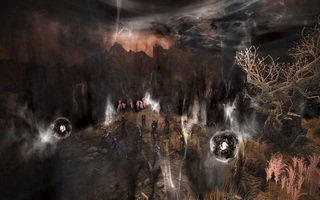
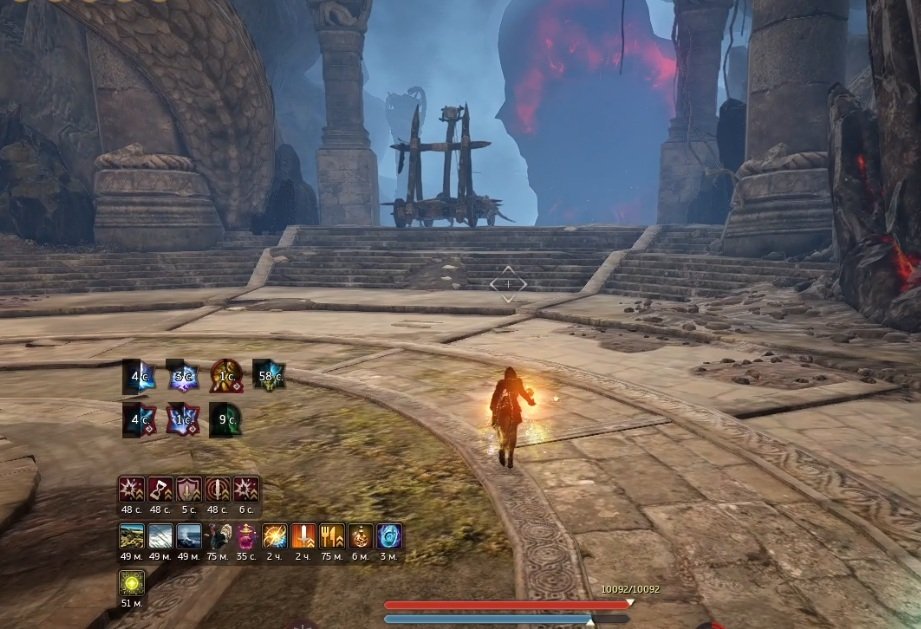
The whole point of the Altar of Blood levels is to protect the central relic from monsters. There are four rifts where monsters come from—three small ones and one large central one.
Afuaru
Afuaru will periodically appear in the arena; killing him will restore the relic’s HP. So use him wisely to restore the relic’s HP at the right time.
Alketa
On some levels, Alketa will appear near the relic. A message will appear on the screen before she appears. You must kill her quickly. Once you kill her, she will grant you a temporary buff in the form of a fairy, which will help you destroy monsters. The buff mechanics are the same as in the Orzekea monster zone.
The best option is for this buff to be taken by the player who controls the central rift, since that is where the largest number of monsters are.
Mechanics
On all levels with monsters, the main goal is to prevent the monsters from reaching the relic.
The phrase “Groups of monsters hunting the relic appear on the outskirts,” “Hordes of monsters hunting the relic continue to advance,” means monsters will be coming from different directions.
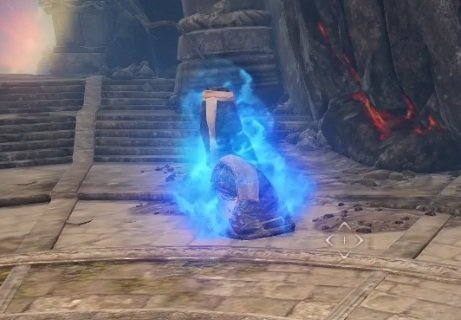
Before monsters appear in the rift, the rift arch will be highlighted in gold, helping you navigate.
Overall, the monsters are easy to kill, but there are many of them and they are sometimes fast, so this can be a challenge.
Several waves of monsters appear, then an elite monster appears, followed by several more waves of monsters, and then another elite monster. Before the elite monster appears, you’ll see the phrase “A monster emitting powerful energy appears.” The elite monster moves from the central rift. It’s best not to wait for it to emerge from there, but to run to the end of the rift corridor and start attacking it immediately, especially at higher levels.
Level 1
No problem, just kill Gyfin Rhasia monsters and the elite monster Butcher of Gyfin Rhasia.
Below you can see how it works to get a basic idea.
Level 2
Kill monsters in the Thornwood Forest and the elite monster Ahib Salun Wolf Spearmaiden.
Level 3
Boss – Thundercloud Kutum:
- Avoid the red circles on the floor
- The green circle indicates where Kutum will dive
- Destroy the Kutum’s Remnant
Level 4
Kill Ulukita monsters (fast monsters) and the elite monster Ancient Puturum.
Level 5
Kill Cadry Ruins monsters (monsters with block) and the elite monster Cadry Commander
Level 6
Boss – Ronin
During the battle, dodge the boss’s attacks; he uses Bound and Knockback techniques.
After the phrase “Ronin summons the Mirror of Ron,” destroy the ronaros summoning site in the rifts. If you don’t destroy it, ronaros will spawn from there in huge numbers, and you will lose.
Level 7
Kill Saunil monsters.
Periodically, a Saunil Mobile Catapult (Saunil Catapult (Illusion)) appears from the central rift. Destroy it immediately – it deals heavy damage to the relic.
Kill the elite monster Saunil Crescent Chief
Level 8
Kill Ulukita monsters and the elite monster Tungrad Putarek
Level 9
Boss – Sangoon
The mechanics of the Sangoon battle are essentially the same as in the Black Shrine. But if you’ve never been there, then:
- Avoid the red zones
- Avoid the golden bar that periodically crosses the arena
- When tigers appear on either side of Sangoon, kill them, otherwise Sangoon will restore HP.
Level 10
Kill Ulukita monsters and the elite monster Tungrad Putarek
Level 11
Kill Morning Light monsters (Dokkebi) and the elite monster Geuseunsae.
Two types of statues will appear here.
Kkebidol – when it glows blue, it deals damage. Time Bomb
The second tower is your assistant
The tower will spawn a blue spirit firefly that follows you if you get close. If you quickly lead the spirit firefly into a crowd of mobs, it will explode them.
The mechanics are reminiscent of the battle in Dokkebi Forest.
Level 12
Boss – Duoksini
- Avoid the blue zones
- “Absorb the power of the sun and moon!” – Jump into the center of the circle and absorb the yellow spirit and the red one there.
- If small Dokkebi appear, kill them; they restore your HP.
- When spirits appear around the circle, kill the yellow ones.
Level 13
Kill monsters of the Ash Forest and the elite monster Ahib Griffon
Level 14
Kill Atoraxxion monsters and the elite monster Serpen
Level 15
Boss – Gumiho
- Avoid attack zones, flames, and the fox’s attacks
- After reaching 50% HP, kill the copies
- Avoid touching the blue flames
Level 16
Kill Orzekea’s monsters and the elite monster Urugon
Level 17
Kill monsters in the Mirumok Ruins and the elite monster Offin Tett.
Level 18
Boss – Jigwi
The mechanics are the same as in the Black Shrine
- Avoid the attack zones.
- Destroy the lights around the arena.
- First, he’ll attack halfway across the arena. Watch where he’s aiming and jump behind him.
- Then he’ll do 5 attacks in the direction of his hand. Watch his hand and jump behind him.
- “Hot! I’ll incinerate everything here!” – a meteor shower begins. Stay at the edge of the arena.
- Then destroy the lights around the arena again.
- After 50% HP, he uses a “pizza” attack, leaving you a pizza-shaped area. The safe zone shifts clockwise.
- A dome appears on the boss, and square seals form around him in the arena. Stand in the seals (fill all the seals). You can stand in one seal if there are only two seals, but if there are three, you must fill all the seals.
- While the boss is under the dome, he can’t be attacked!
- Then the “pizza” attack begins again.
- Then the “seal” mechanic starts again.
- Then the “pizza” attack starts again.
- Then the boss falls with a debuff – try to deal as much damage as possible to him.
If you haven’t killed him, all mechanics will start in the same order.
Level 19
Kill Edania’s monsters and the elite monster Possessed Muraka.
Level 20
Kill Edania’s monsters and the elite Coral Naga Frontliner.
Here’s the problem: the Coral Dreamfish are truly ghostly… sometimes they’re just invisible.
And until you kill all the Coral Dreamfish, the elite monster doesn’t take damage.
We did it like this: one player remained in the arena when the elite monster appeared. At that moment, that player flooded the entire arena area around the relic to destroy all the Coral Dreamfish, which weren’t visible.
As soon as the elite monster took damage, that player joined the others and killed it.
Level 21
Boss – Jordine
Simply dodge his attacks while attacking Jordine. When blue circles appear in the arena, everyone should stand on their own circle (two people can’t stand on one – it’ll be a one-shot). The circle will teleport you to the platform.
Up. When you teleport to the platform, it starts flashing and collapses beneath you (you can even hear the sound of breaking glass). So, you should quickly move to the upper platform. Jordine will then deal a critical hit that won’t hit you. After that, descend down to Jordine and kill him.
Overall I liked it!
1st Abyssal Illusion
The 1st Abyssal Illusion comes after the 21st Altar of Blood illusion.
Basically, the battle mechanics are no different from the previous levels.
However, the rifts aren’t highlighted if monsters are coming from them, so you must keep an eye on them yourself.
Spook will periodically appear, granting you a debuff that reduces your field of view. Once you kill him, the debuff will disappear, so it’s best to kill him as soon as he appears
2-3 Abyssal Illusion
Essentially, the mechanics are the same as in the previous levels.
Increase your attack speed; the more attack you have, the faster you’ll kill monsters. Use attack buffs, perfume, etc.
Tip. Enter the Altar of Blood and wait until you reach 100% Black Spirit rage. Start attacking with 100% rage, and then use it as it builds up.